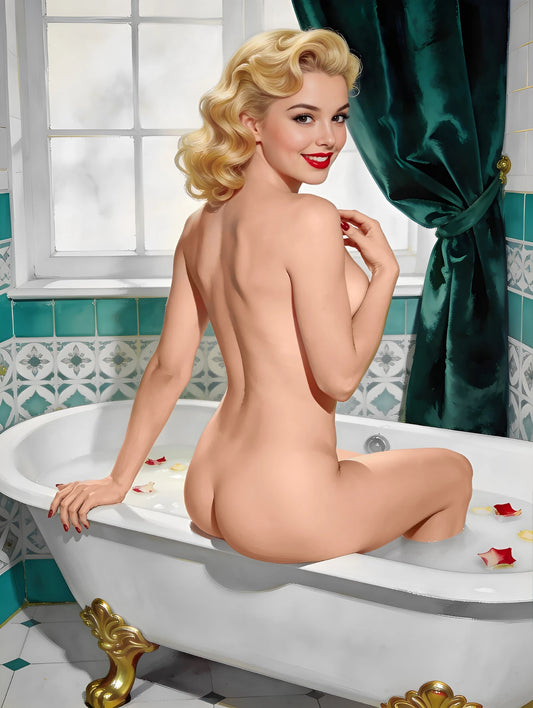
There is a specific, deeply satisfying moment in home decorating when a space suddenly feels complete. When the furniture is right, the lighting is right, and then a piece of art goes on the wall and everything snaps into focus — the room becomes a room, the space becomes a home, the collection of furniture and objects becomes a place with genuine personality and soul.
Vintage pin up art creates this moment with particular power. The bold colors, the confident subject matter, the warm and human energy of a great pin up print or portrait — these elements have an almost immediate impact on any space. They turn walls from surfaces into statements.
At Pinup Art Studio, we've helped thousands of customers create beautiful pin up art displays — from single statement pieces to complete, carefully curated gallery walls. This guide consolidates everything we've learned into a comprehensive resource for creating the most beautiful possible display of vintage pin up art in your home.
🎯 Phase 1: Defining Your Display Goal
Before choosing any specific pieces, clarity about your overall display goal will make every subsequent decision easier.
Single Statement Piece 🖼️
Goal: One powerful, perfectly chosen piece that commands a specific wall or space.
Best for: Living room above sofa or fireplace, bedroom above headboard, dining room feature wall, entryway.
Approach: Choose your most significant, most visually powerful piece — typically a large format canvas or a custom portrait. Everything else in the space supports this single focal point.
Our recommendation: A large-format custom pin up portrait in our vintage pin up framed canvas format — at least 24"×36", ideally larger.
Coordinated Pair or Trio 🖼️🖼️
Goal: Two or three closely related pieces displayed together as a composed grouping.
Best for: Hallways, smaller walls, spaces where a full gallery wall would feel overwhelming but a single piece would feel insufficient.
Approach: Choose pieces in the same style family with complementary color palettes. Display in a horizontal line or a triangular arrangement.
The Full Gallery Wall 🖼️🖼️🖼️🖼️
Goal: A comprehensive display of multiple pieces that creates a rich, immersive visual environment.
Best for: Living rooms, dining rooms, home offices, salon and bar spaces, any space where maximum visual impact is the goal.
Approach: Combine prints of varying sizes in coordinated frames around a central anchor piece.
🎨 Phase 2: Choosing Your Pieces
Start with Your Anchor Piece 🌟
Every gallery wall needs an anchor — the most significant, most visually powerful piece that everything else builds from. This is typically your largest print or your most important custom portrait.
For most home gallery walls, the anchor is:
- A custom pin up portrait — the most personally meaningful and visually distinctive option
- A large vintage pin up canvas — rich, gallery-quality visual presence
- The largest and most compositionally complex print in your collection
Build Your Supporting Pieces 🎨
Supporting pieces complement and contextualize the anchor without competing with it. They are typically:
- Smaller than the anchor
- Related in style or color palette
- From our Pinup Girl Prints collection or 1950s Pinup Girls collection
- Mixed in size (medium and small pieces creating visual rhythm)
Color Coordination Strategy 🌈
For a cohesive gallery wall, your pieces should share a color connection:
Monochromatic approach — All pieces in the same color family (all warm reds and creams, all cool blues and greens).
Complementary approach — Pieces in complementary color families (warm reds + cool blues, creating color tension that is visually dynamic).
Neutral binding — Pieces with diverse colors connected by consistent neutral elements (consistent skin tone warmth, consistent presence of black or ivory).
Palette matching — Match the gallery wall palette to the room's dominant colors — deepening the integration of the art into the space.
📐 Phase 3: Sizing Everything Correctly
This is where most gallery walls succeed or fail. Getting the proportions right requires some measurement and math, but it's entirely manageable.
The Core Measurement Rule 📏
For a gallery wall, the total area covered by your display (including the spaces between frames) should be approximately 60–75% of the wall width and should be centered on the wall.
Example calculation:
- Wall width: 120 inches (10 feet)
- Target display width: 72–90 inches (6–7.5 feet)
- Total art arrangement including gaps should fit within this range
Standard Size Combinations That Work 📋
For a 6-foot sofa wall:
- 1 large (24"×30") anchor + 2 medium (16"×20") flanking pieces
For a standard 8-foot wall:
- 1 large (24"×36") anchor + 4 medium (16"×20") supporting pieces in asymmetric arrangement
For a 10-foot dining room wall:
- 3 large pieces (24"×30") in a horizontal row
- OR 1 very large (30"×40") anchor + 6 medium and small supporting pieces
Gap Measurements 📏
Gallery-style spacing: 2–3 inches between frames. Creates a clean, organized, professional appearance.
Maximalist spacing: 1 inch between frames. Creates a denser, more immersive, more eclectic effect. Better for very large walls where you want to fill space completely.
🖼️ Phase 4: Framing Decisions
Consistent framing creates visual cohesion in any gallery wall. Variable framing creates visual complexity but risks visual chaos.
The safest approach: Choose one frame finish (all matte black, all walnut, all gold) and vary the frame shapes and sizes within that finish.
The adventurous approach: Mix two complementary frame finishes (black and gold, or walnut and brass) with deliberate intention — keeping the distribution balanced across the gallery.
Frame style by interior aesthetic:
| Interior Style | Best Frame Choice |
|---|---|
| Mid-century modern | Walnut or simple matte black |
| Traditional/classic | Deep gold or dark mahogany |
| Contemporary | Matte black or natural wood |
| Maximalist/eclectic | Mix of gold and black, varied ornament |
| Coastal/natural | Natural wood or white |
📍 Phase 5: Planning the Arrangement
Before any nails go in:
Step 1: Assemble all frames — All pieces framed and ready to hang.
Step 2: Lay on the floor — Arrange your framed pieces on the floor in front of the wall, experimenting with different compositions until you find one that feels balanced and visually dynamic.
Step 3: Paper template test — Cut paper to the exact dimensions of each frame. Arrange the paper templates on the wall with painter's tape. Step back and assess from across the room. Adjust.
Step 4: Mark center points — Once your arrangement is confirmed, mark the center point of each template with a pencil dot — this is where your hanging hardware will go.
Step 5: Hang anchor first — Remove templates one at a time and hang each piece, starting with the anchor and building outward.
Step 6: Check with a level — Even small mis-levelings become obvious after hanging. Use a level on each piece before moving to the next.
🏡 Gallery Wall Inspiration by Room
The Living Room Gallery Wall 🛋️
Anchor: Large custom portrait in framed canvas format Supporting: 4–6 coordinated prints from Pinup Girl Prints collection Frame: All walnut or all matte black Arrangement: Anchor centered above sofa, supporting pieces flanking in asymmetric arrangement
The Bedroom Boudoir Gallery 🛏️
Anchor: Custom portrait above headboard Supporting: 3–4 smaller romantic prints on adjacent wall Frame: Gold frames for maximum glamour Arrangement: Anchor above headboard, supporting pieces creating a boudoir gallery on a side wall
The Home Bar Gallery 🍸
Anchor: Large rockabilly or Hollywood portrait print Supporting: Multiple coordinated prints from 1950s Pinup Girls collection Frame: Dark wood or matte black for maximum dramatic impact Arrangement: Dense, maximalist — fill the bar wall completely with art
The Home Office Gallery 💼
Anchor: Custom self-portrait or Pinup Queen Portrait above desk Supporting: 2–3 motivational prints at eye level around the workspace Frame: Clean matte black for professional context Arrangement: Statement anchor + curated supporting pieces for video call background
❓ Frequently Asked Questions
Q: How many pieces do I need for a gallery wall? Typically 5–9 pieces creates a full gallery wall feel without becoming overwhelming. Start with fewer and add over time rather than buying everything at once — your taste evolves with your collection.
Q: Can I mix portrait orientation (taller) and landscape orientation (wider) prints? Yes — mixing orientations creates visual rhythm and prevents the gallery from looking too uniform. Typically use portrait orientation for figurative pin up prints and landscape orientation for supporting decorative pieces.
Q: What's the best way to start if I have no art at all? Start with a single custom portrait or one large print from our Pinup Girl Prints collection. Live with it for a few months, see what works and what the space needs more of, then add pieces gradually.
🚀 Create Your Gallery — Start Today
The perfect gallery wall doesn't arrive fully formed — it's built over time, piece by piece, with thought and intention and genuine love for the art being collected.
But it starts with a single first piece.
👉 Browse the full Pinup Art Studio collection today — custom portraits, canvas prints, and complete framing options — and find the first piece of your gallery wall.
🖼️ One piece at a time. A lifetime of beauty on your walls. ✨